

How To Repair A Rip In A Tent Along A Seam
How to repair a damaged tent
8fe0f0f7-2072-4588-af6b-758f91337036
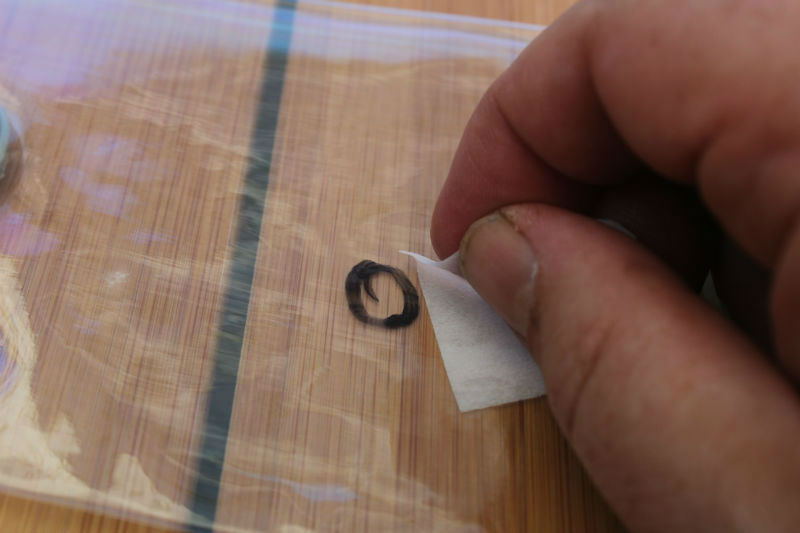
Camping Skills It doesn't matter how carefully you look after your tent, there's a fair adventure that it will eventually suffer some damage. But before heading to the local dump, endeavour a bit of DIY repair work. Chances are, if something goes incorrect it's likely to be while you are on site. Running repairs can limit further damage and hopefully keep the elements out. Every camper should have a roll of duck tape in their kit – it'southward invaluable for emergency repairs on everything from broken poles to ripped fabric and damaged PVC windows. Once you're back habitation you can think near longer-term repairs. Some rips can exist simply sewn back together, either by hand or with a sewing machine, so coated on both sides with seam sealant. For ragged tears and seams information technology makes sense to add together a patch. Gluing likewise as sewing the patch on will make the repair more durable and, once again, y'all should utilize a seam sealant. For an constructive temporary repair to a snapped pole, slide a short metal tube over the break and tape in identify. Most repair kits will come up with one of these sleeves but if yours has gone missing (or has already been used) then a length of tube of the correct diameter from a hardware shop will practise the trick. If a fibreglass pole splits along its length, the reply is to wrap the pole in duck tape. A wide range of spares is available including spring clips for poles, pole kits and sections and stupor cord repair kits. Happily, tents are able to take quite a lot of abuse but every now and then the fabric will be torn and a repair is needed. As they are not meant to be waterproof, inner tents can exist stitched upwardly fairly hands even when torn in a ragged design. Damage to the outer waterproof flysheet is dissimilar. Starting time of all, check the overall country of the fabric. If the damage is down to textile being weakened and worn out by age or the effects of the dominicus, then a temporary set might be all that is possible and a new tent volition need to be added to your shopping list. An accidental tear or hole in a newer tent with years of life ahead of it needs a different approach. Self-agglutinative patches or a curt-length of duck tape can be used every bit an emergency prepare for a small tear or hole. But brand sure the area around the damage is clean and dry out to ensure a secure prepare. Spray all around the repaired expanse with reproofer to make it more waterproof. Tent windows can as well exist repaired with tape – and you can fifty-fifty get clear versions if y'all prefer. Once dwelling house, it is time to assess the trouble and determine how all-time to deal with it for the long term. A nylon flysheet that is torn cleanly is relatively easy to hand-sew or run through a domestic sewing machine. Once the repair is done, paint on both sides with seam sealant. It pays to add together plenty of actress stitching at each end of the rip to ease the inevitable weakness under strain. Sometimes ragged tears and seams are also awkward to stitch and if that is the example information technology makes sense to add a patch. Brand certain information technology is big enough to cover the rip generously with edges folded under to avoid them unravelling. Gluing also as sewing the patch helps to spread the strain on stitches but ensure the gum won't impairment the fabric. Sewing patches together on each side of the rip or hole, gluing them and applying seam sealant should ensure a durable flysheet repair. On inflatable tents, the air tubes are tough and should provide years of trouble-free camping if you follow the instructions. Simply if you do get a puncture it's possible to repair it yourself, at to the lowest degree until you can contact your dealer to organise a replacement. First of all, don't open the protective sleeve until you're sure you have a leak and never open it when it's fully inflated. If a tube appears to accept lost force per unit area, it may really be due to environmental factors – pressure level can drop in cold temperatures so you may need to add together air to recoup, particularly at night. If yous are sure you have a puncture, let out all the air and try to locate the harm. Look for visible damage and if that doesn't aid, pump in some air and listen closely for air escaping or feel it confronting your cheek. Apply a piffling h2o to the spot you lot suspect every bit small bubbles will evidence upwardly. One time you lot've institute the puncture, mark the damaged area, completely deflate the tube and open the sleeve cypher until y'all achieve the location of the leak. Clean the expanse around the puncture then cut out and advisedly apply a repair patch (Stormsure, Tear Aid and Stormsure all supply suitable products), ensuring that it's smoothen and in that location are no air bubbling nowadays. Once the adhesive is dry, supersede the sleeve and inflate, leaving overnight to make certain the repair has worked. In an emergency, you tin can also use duck record, although this is unlikely to exist a long-term solution. When you get domicile, contact your retailer and find out about beingness sent a replacement tube. Zips are ane of the simplest parts of the tent design but one that can go wrong so hands. Pitching the tent properly should avoid the trouble of the zips bursting open because the fabric is drawn too tight. The other side of the coin is communicable loose material in the zip'southward teeth. You need to avoid damaging zip and cloth. Keep the zips free of dirt or dust to help them to run freely and if all else fails make certain you lot pack a few safe pins to secure the door. Guyropes can go worn through friction, especially the loop that goes around the peg. Pack a decent length of spare cord and a few adjustable runners Sewn-in groundsheets tin hands be damaged by stones on your pitch. A tear or hole can exist stock-still with a patch simply if there is a lot of damage then information technology'due south incommunicable to fix. The trouble so is if you lot have a sewn-in groundsheet, your entire tent is rendered useless. The all-time way to avoid this is to use a groundsheet footprint from the get-go. This protects the groundsheet from any precipitous objects on the pitch and is much easier to make clean when you lot get home. When eyelets neglect merely the textile surrounding fabric is fine, whatever repair usually means having to adhere another eyelet (simple plastic and metal versions tin be found in outdoor and hardware shops). If the fabric is damaged and then rather than using similar fabric, pick a heavier weight for actress durability. If the failed eyelet is close to a seam or hem, then place the new one farther away to reduce the strain. Here are the essentials y'all should include in your DIY tent repair kit ane DUCK TAPE 2 METAL POLE SLEEVE 3 SPARE LENGTH OF POLE 4 SELF-Adhesive TENT PATCHES 5 NEEDLE AND THREAD half dozen SPARE GUYLINES vii SEAM SEALANT 8 BITS & PIECES Camping magazine has been the voice of campers for over 60 years! It is the Great britain'due south merely mag devoted to the wonderful world of life under sheet and the freedom information technology brings. Every consequence is packed with inspirational travel, the top camping ground sites to stay on, reviews of the latest tents, camping gear reviews, practical assist and much more than to help you get the most out of your camping ground adventures. Desire to know more about Camping Magazine? About Camping Magazine POLES

FLYSHEETS
.JPG)
INFLATABLE BEAMS
ZIPS
GUYLINES
GROUNDSHEETS
EYELETS
REPAIR KIT
Every kit should take a roll. Has a million uses on the camp – from temporarily patching ripped a flysheet to treating blistered feet.
Tent poles take a habit of snapping at the almost inconvenient times. For an effective temporary repair, slide a short metal tube over the break and tape in place. Well-nigh repair kits will come with one of these sleeves merely if yours has gone missing (or has already been used) and so a length of tube of the right diameter from a hardware shop volition do the trick. If a fibreglass pole splits along its length, the answer is to wrap the pole in duck record.
If a repair is impossible, a length of pole is the solution. Some tents come up with one included but if not you should be able to purchase one from your local retailer or directly from the manufacturer.
These will comprehend upwardly any pocket-sized rips or punctures in your tent's fabric for the length of your holiday They come in diverse fabrics and colours – in fact your tent might even come up supplied with a patch of its own. Include a small bottle of reproofer in your kit to spray onto the patch and keep your tent waterproof.
Split seams and peg loops or guyline anchors coming lose are common problems. A small sewing kit will let y'all to deal with elementary repairs like this.
Guyropes can get worn through friction, especially the loop that goes around the peg. Pack a decent length of cord and a few adaptable runners for an instant repair.
Leaking seams can be repaired by painting sealer on to the seam. It'll have a couple of days to dry fully – and you accept to promise there volition exist no pelting in the meantime.
A wide range of spares is available at specialist stores including jump clips for poles, pole kits and sections and shock string repair kits.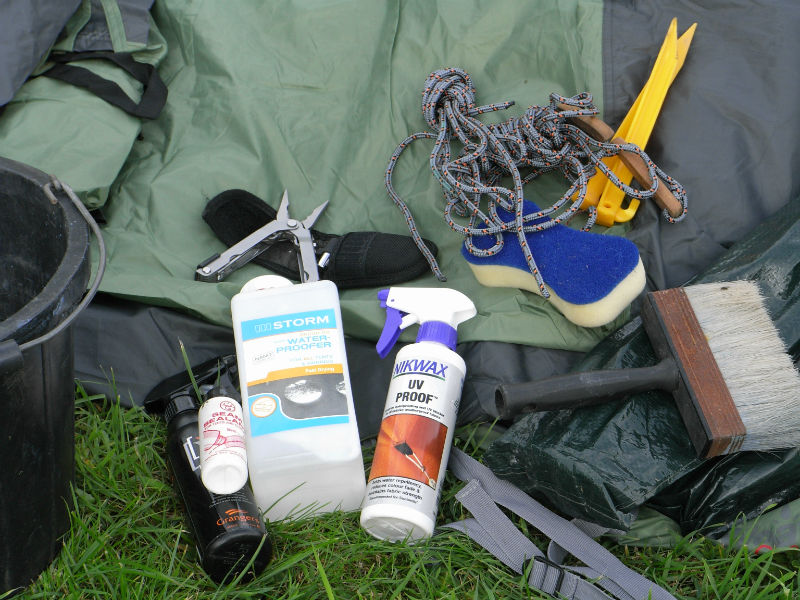
Skilful Camping ground communication to your door!

Back to "Practical Advice" Category

How To Repair A Rip In A Tent Along A Seam,
Source: https://www.outandaboutlive.co.uk/camping/articles/practical-advice/how-to-repair-a-damaged-tent
Posted by: bolesdound1945.blogspot.com
0 Response to "How To Repair A Rip In A Tent Along A Seam"
Post a Comment